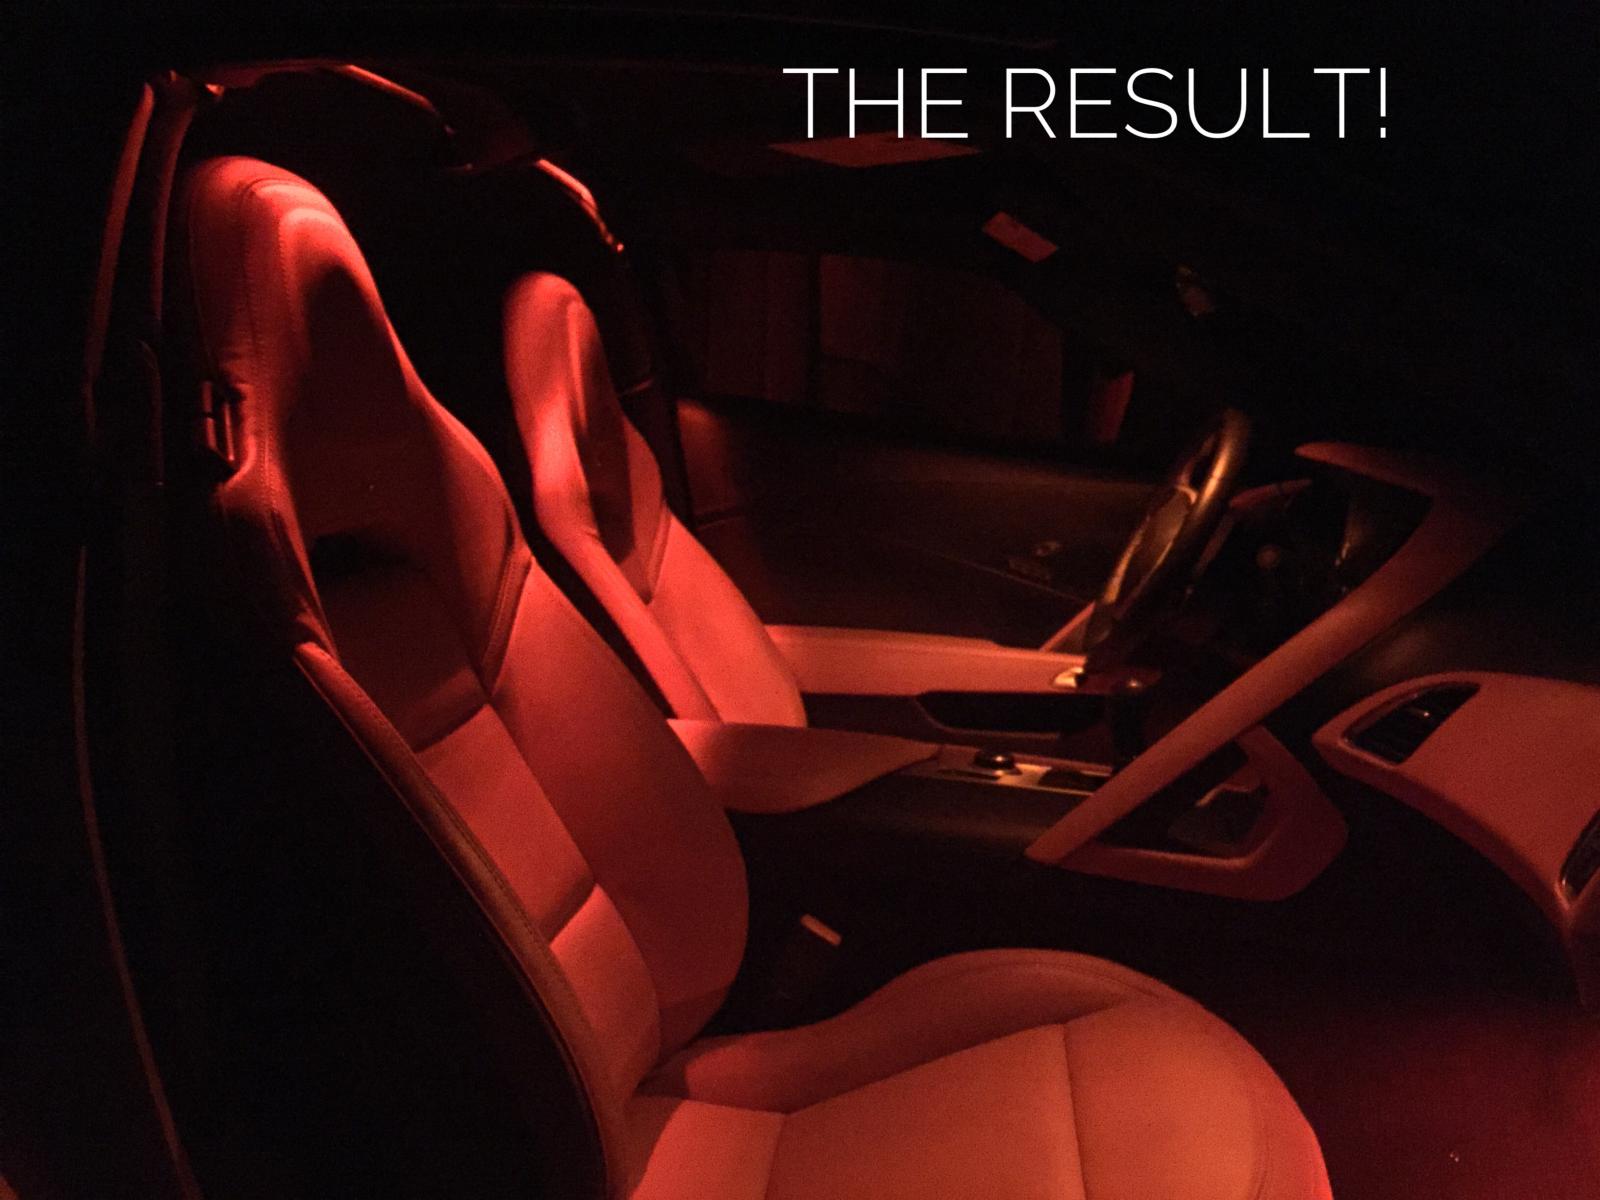
I recently modified the interior lighting of my 2014 Z51 by tinting the map lights and changing out the footwell lights using kits that are available on-line. However, I was somewhat disappointed with the result, because only the bottom half of the cabin was lit. What I wanted was a cabin that "glowed" from ceiling to floor. To get this effect, I figured out a way to also add lighting to the upper part of the cabin. The project cost maybe $20 and took about 30 minutes to install. This is what I did (also see attached photos).
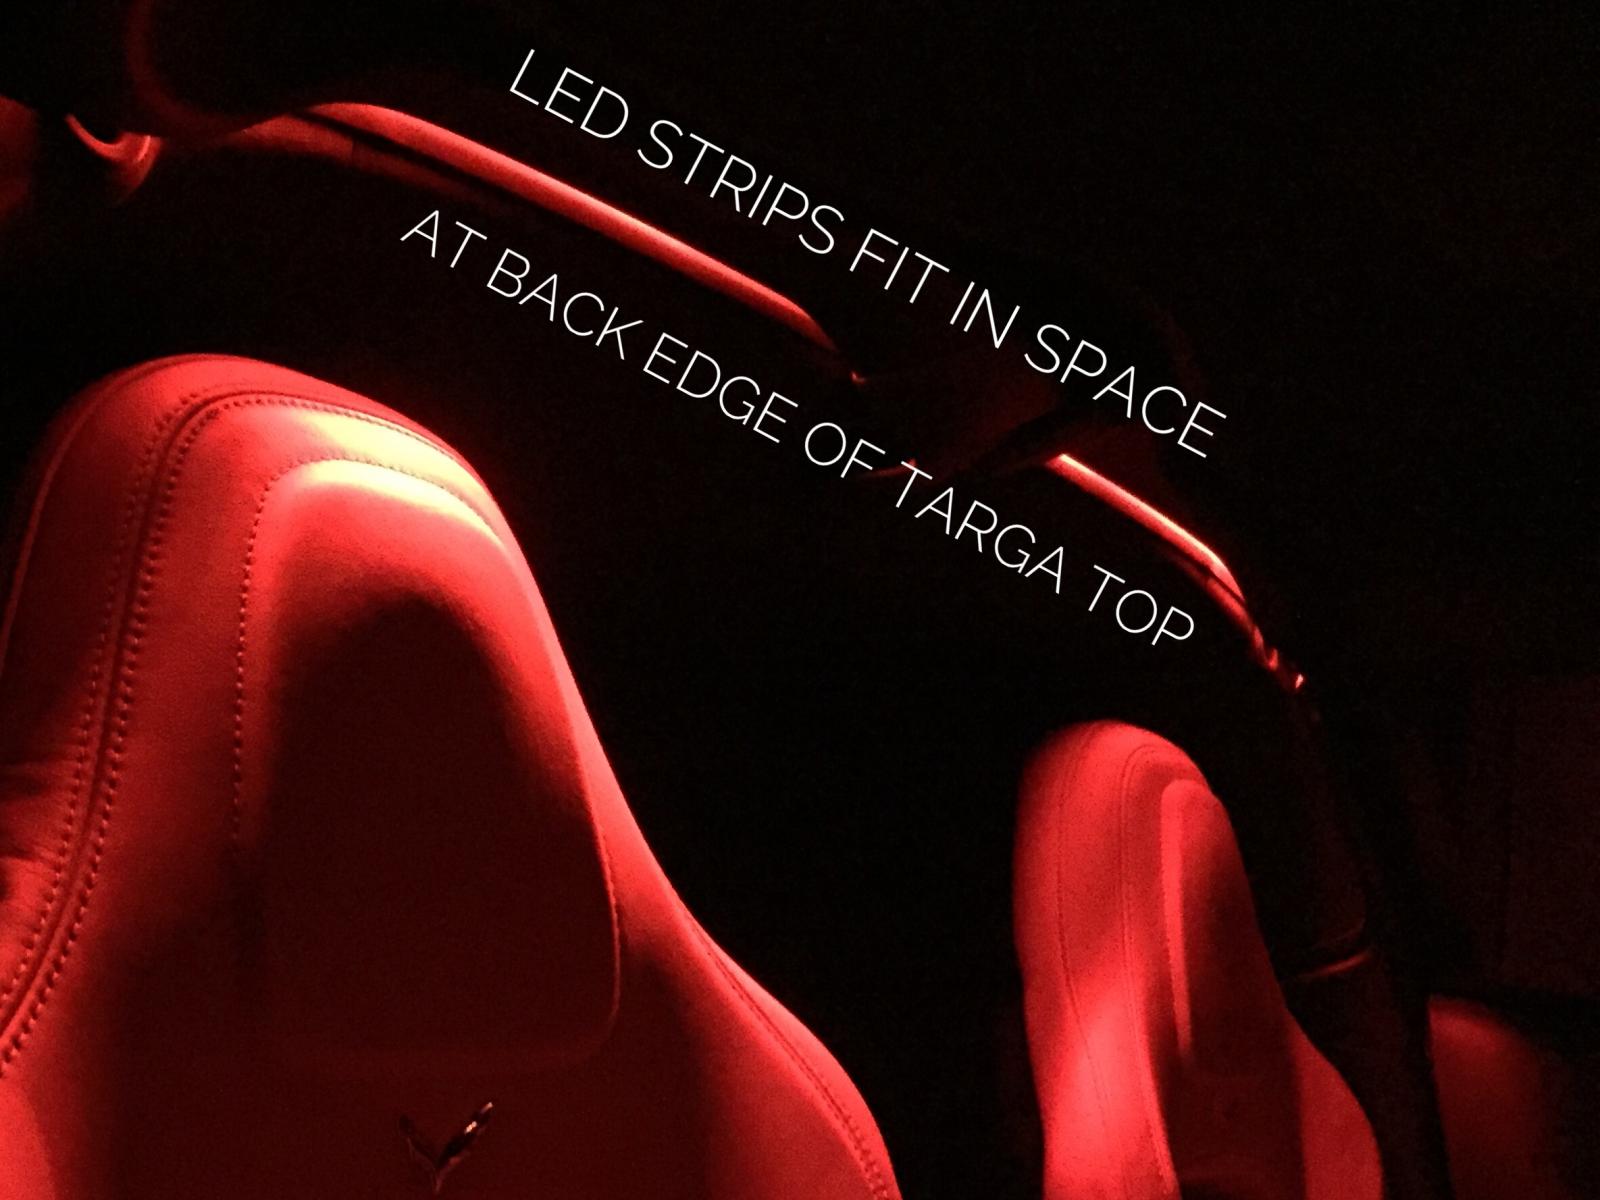
1. If you sit in your car and look up at the back edge of the targa top, directly above the seat backs, you will see a thin gap between the targa top and the roof of the car. LED strips will fit into this thin gap. Unlatch the targa top and you will see that this gap is directly below the back lip of the top. While the top is unlatched, attach two LED strips to back lip; one strip positioned above each chair back with the wires facing outward. I used two 18-inch strips with 3M tape backing. Re-latch the targa top.
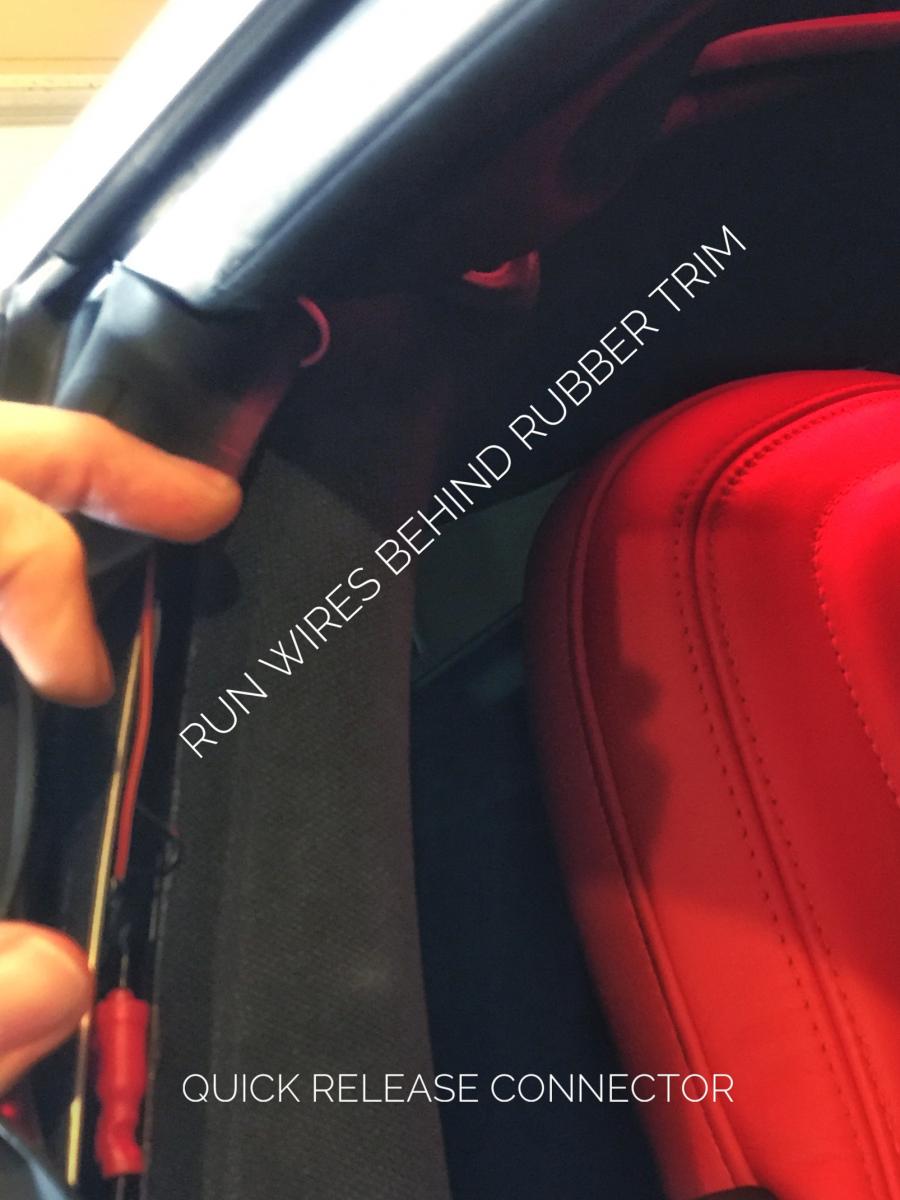
2. Run the wires from each LED strip under the rubber trim at the top of each door frame. Connect these LED wires to 20-gauge wire using four quick-release connectors, two on each side. I used bullet connectors (
https://www.amazon.com/dp/B01D9CVFTA...i_PlQFybHPE8HP), though other connector types will also work. Hide these connectors and the wire under the rubber trim; there is plenty of space. The connectors allow you to quickly disconnect the wires when you want to remove the targa top, and reconnect them when you put the top back on.
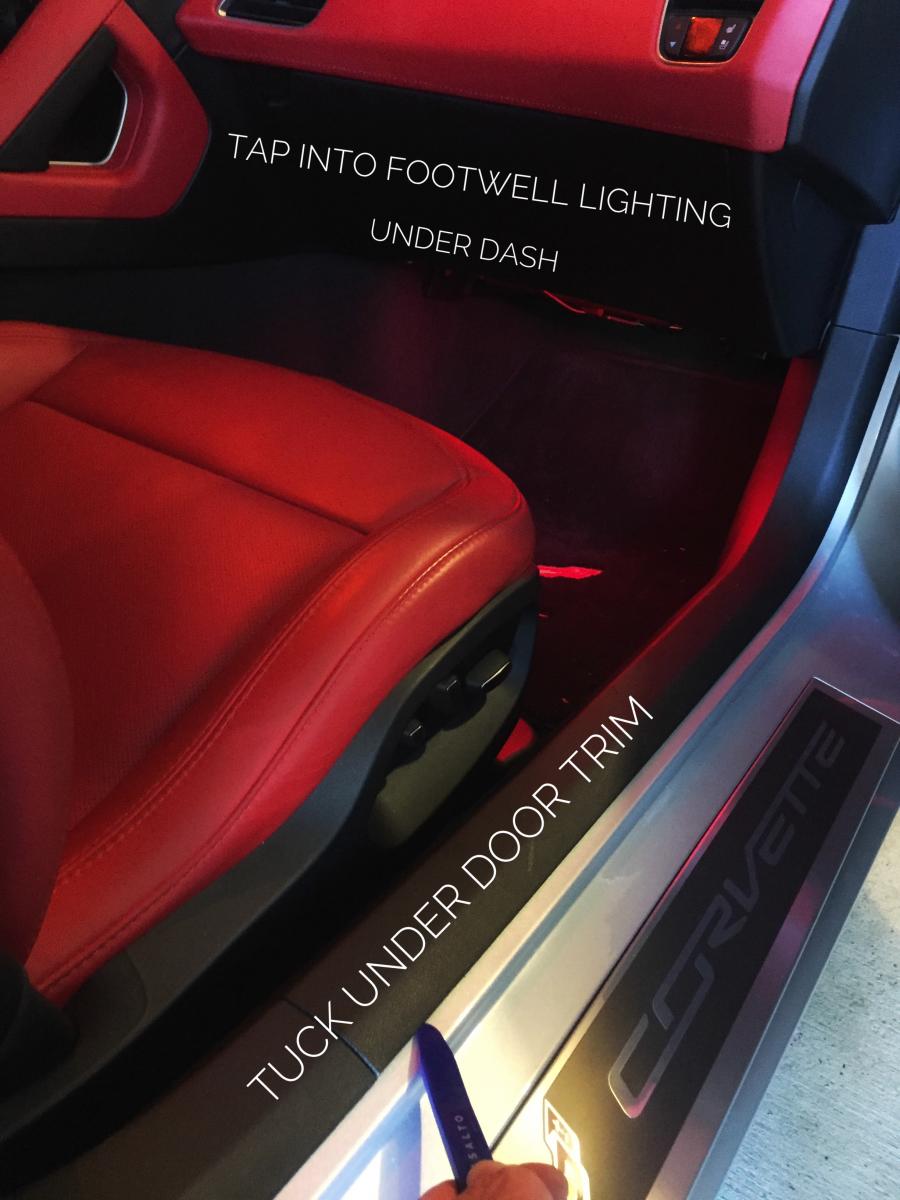
3. Along each door frame, run the 20-gauge wire under the plastic trim (it was easy to tuck the wires; no need to remove the trim), and then tap these wires into footwell lighting wires under each side of the dash. I used Alightings Quick Wire Splice Connectors, which worked well (
https://www.amazon.com/dp/B017FT5G4I..._BhQFyb42YF829).
That's it. It's very easy and makes a huge difference. These lights come on with the footwell lights, and they look awesome!